

Bundles list
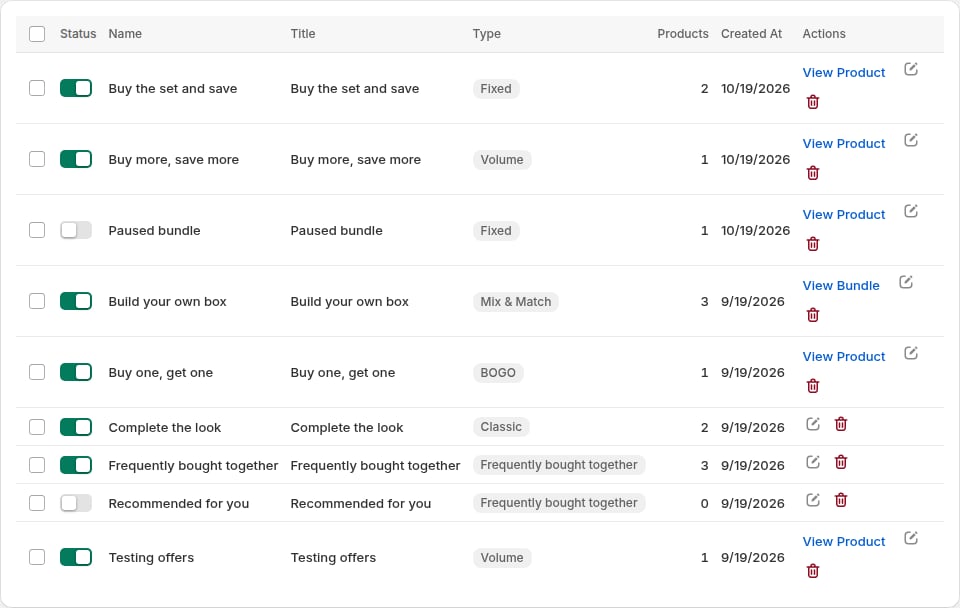
- Bundle name and type
- Number of products in the bundle
- Active or inactive status
- Quick actions (edit, view, duplicate, delete)
Bundle status
Each bundle has a status indicator:- Active: Bundle is live on your storefront. Widgets appear on product pages.
- Inactive: Bundle is saved but not visible to customers. Useful for seasonal bundles or testing.
Creating a new bundle
1
Click Create a bundle
From the Bundles page or home page, click Create a bundle.
2
Choose a bundle type
Pick Quantity breaks, Mix & match, Complete the bundle, Classic bundle, Buy X, get Y, Frequently bought together, or Bundle as a product. That opens the editor for that type with sensible defaults. You can change the look later in Style.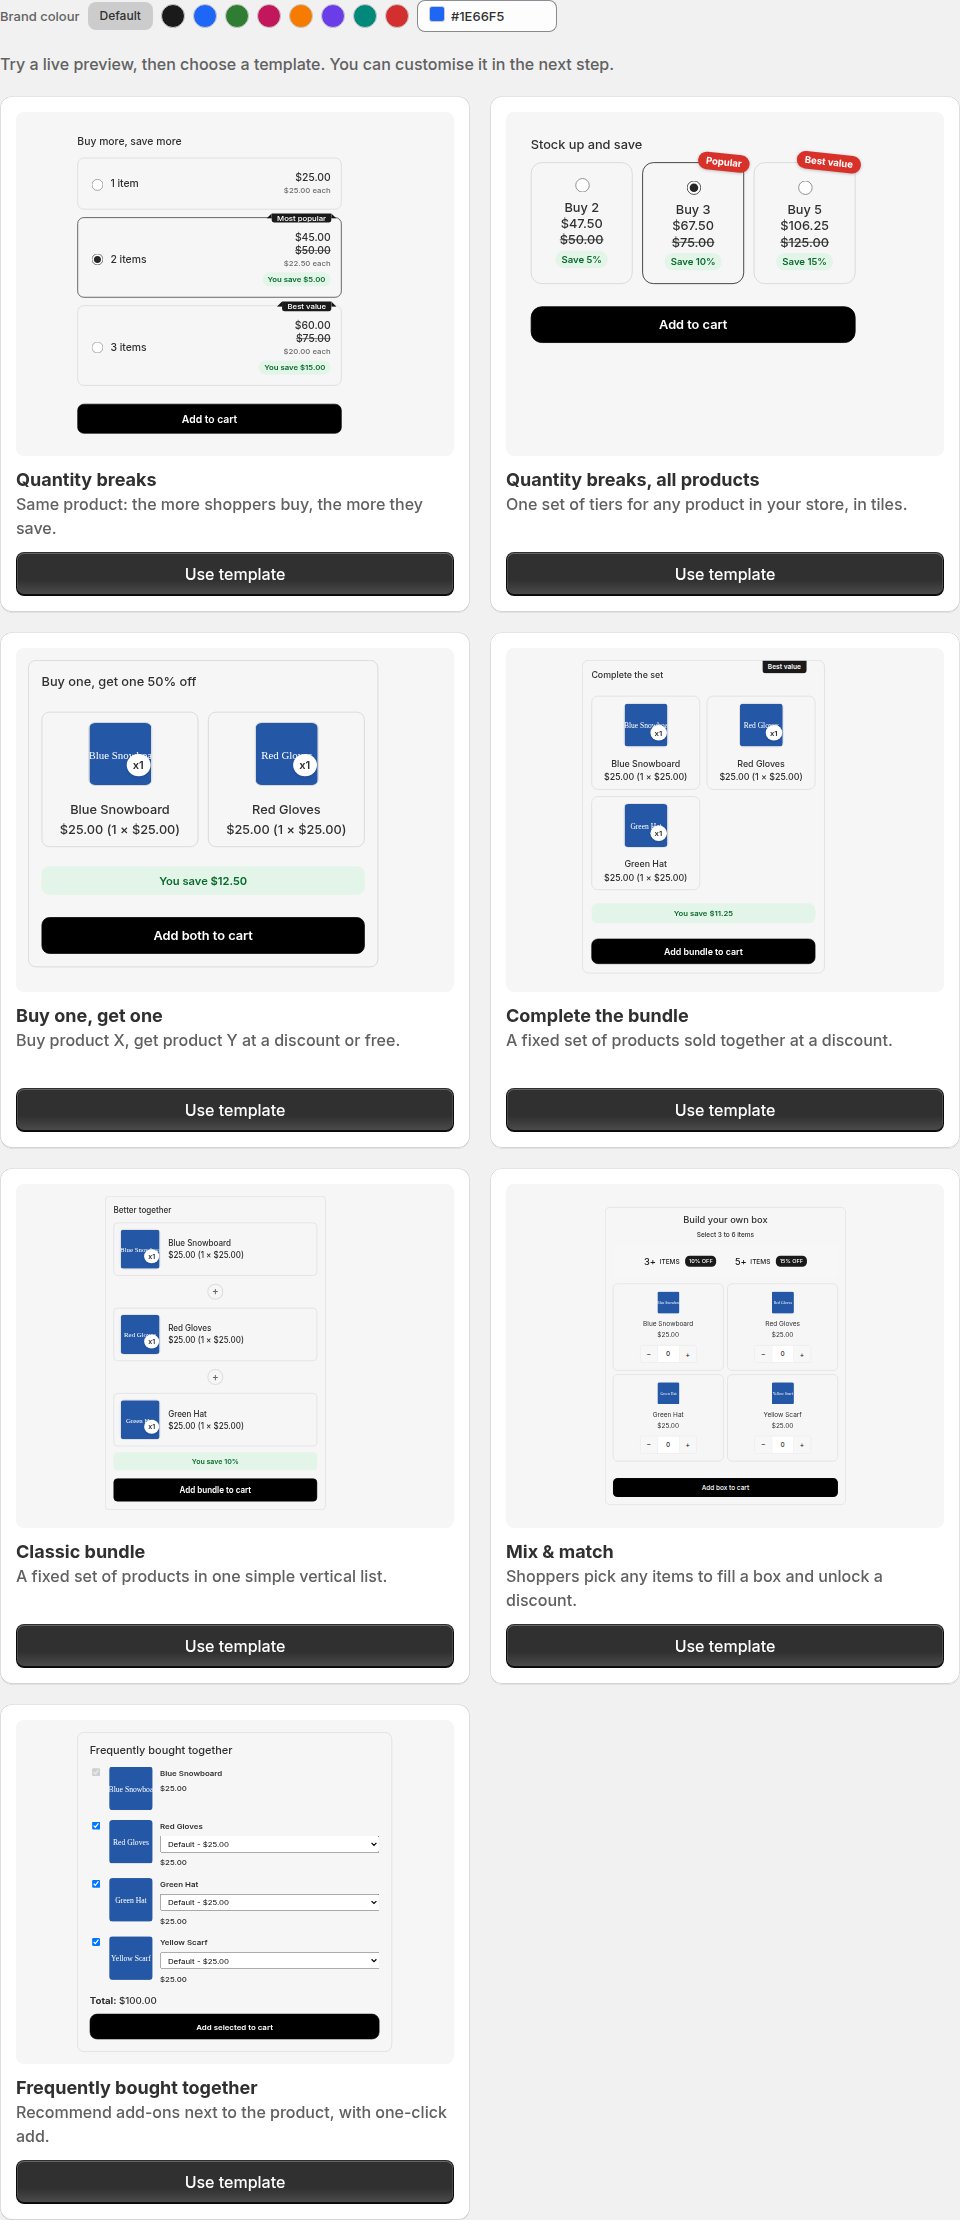
3
Configure the bundle
Fill in Products, Tiers, and Settings. See individual bundle type pages for detailed guidance.
4
Customize appearance (optional)
Open Style in the editor, or click Change style. Then adjust colours, button text, and other styling for this bundle. See Widget design and templates.
5
Save and activate
Click Save to create the bundle. Toggle status to Active to make it live.
Editing a bundle
To edit an existing bundle:- Go to Bundles in the navigation
- Click the bundle you want to edit
- Make your changes:
- Update products
- Change discount amount or type
- Modify bundle name
- Adjust styling
- Click Save
Duplicating a bundle
To create a copy of an existing bundle:- Find the bundle in your bundles list
- Click More actions (three dots)
- Select Duplicate
- Edit the duplicated bundle as needed
- Save and activate
- Creating seasonal variations of successful bundles
- Testing different discount levels
- Creating similar bundles for different product categories
Activating and deactivating bundles
To activate a bundle:
- Open the bundle
- Toggle status to Active
- Click Save
To deactivate a bundle:
- Open the bundle
- Toggle status to Inactive
- Click Save
- Seasonal bundles (deactivate after holidays)
- Testing bundles before full launch
- Temporarily pausing underperforming bundles
- Managing limited-time offers
Editor sections
The editor is grouped into Products, Tiers, Settings, and Style. Optional extras such as Badges, Countdown timer, Free gifts, Add-ons, Social proof, Low stock, and Sticky add to cart start off. Turn one on to edit its content and colours in that section.Scheduling a bundle
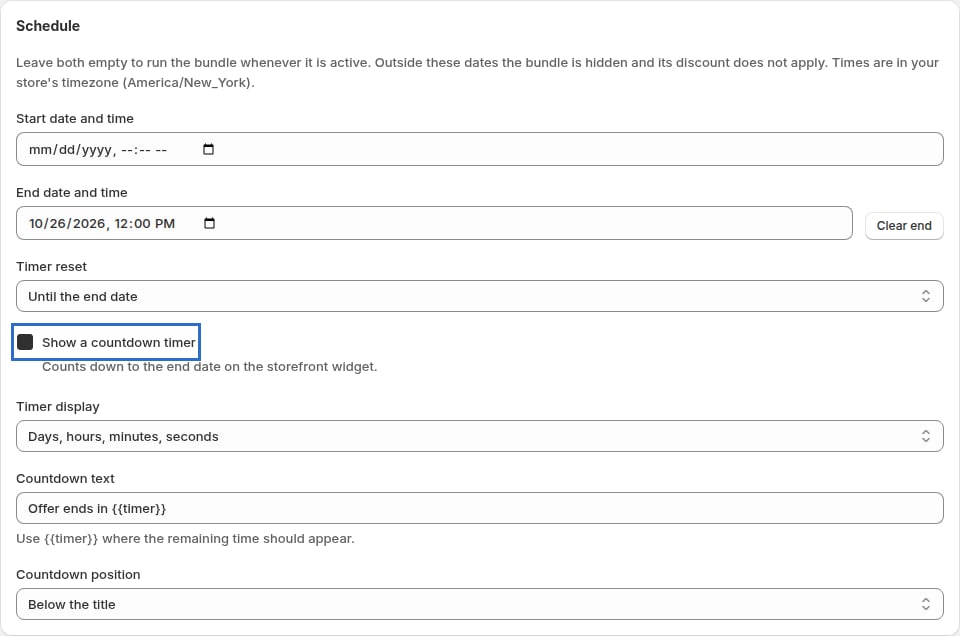
- Open the bundle, then find Schedule in Settings
- Set a Start date and time, an End date and time, or both
- Save the bundle and keep its status Active
Countdown timer
Tick Show a countdown timer to show the time left on the storefront widget. Choose Timer display:- Days, hours, minutes, seconds shows a day count when at least one day remains, for example “Offer ends in 3d 02:14:33”. Under a day it shows the clock only, for example “Offer ends in 02:14:33”.
- Hours, minutes, seconds shows the total hours. The hour count can go past 24, for example “Offer ends in 50:14:33”.
{{timer}} where the remaining time should appear. Use Countdown position to place the timer at the top of the widget, below the title, or at the bottom.
Discount label
Shopify shows a name next to a bundle’s discount in the cart and at checkout. By default it reads “Appfox Discount Code”. To change it, open the bundle, find Discount label and enter the name you want, up to 60 characters. Leave it empty to keep the default.Social proof
Show shoppers how many people bought a bundle. Open the bundle and turn on Social proof:- Show how many people bought this bundle: adds a line such as ”🔥 87 people bought this bundle this week” to the widget, and to the bundle’s card in the cart upsell.
- Count orders from the last: 24 hours, 7 days or 30 days.
- Minimum count to show: the line stays hidden until the count reaches this number. The default is 5.
- Text: use
{{count}}where the number should appear. Leave it empty to use the built-in text, which is translated for each language. Your own text can be translated on the Translations page. - Badge the most popular option (volume bundles): adds a Most popular label to the option shoppers pick most, once at least the minimum number of orders chose it. An option that already has its own label keeps it.
Low stock and sold-out products
Use live inventory as an urgency cue and keep shoppers away from bundles they can’t buy. Open the bundle and turn on Low stock:- Show a low-stock alert: adds a line such as “Only 3 left” to the widget once the stock is at or below your threshold. The number is how many bundles can still be bought, so the scarcest product decides. Products that don’t track inventory, or that keep selling at zero, never trigger it. Not available for Mix & Match bundles.
- Show when this many or fewer are left: the threshold. The default is 5.
- Text: use
{{qty}}where the number should appear. Leave it empty to use the built-in text, which is translated for each language. Your own text can be translated on the Translations page. - When a product in the bundle is sold out: either show the bundle marked Sold out with a disabled button, or hide it.
Targeting customers
Limit a bundle to certain customers, for example to keep wholesale buyers out or to welcome first-time shoppers. Open the bundle and find Customer targeting in Settings:- Audience: show the bundle to Everyone, New customers (no orders yet) or Returning customers (at least one order). Shoppers who aren’t logged in count as new customers. Orders placed with a test payment gateway count too: the app adds the
appfox-test-ordertag to that customer, which lets you test New and Returning on a development store. - Exclude B2B customers: hide the bundle from buyers purchasing for a company.
- Only for customers with a tag: enter comma-separated customer tags. Customers need at least one of them.
- Hide from customers with a tag: customers with any of these tags never see the bundle.
- Apply discount only via the bundle widget: only products added from the bundle widget get the discount. The same products added another way pay full price.
Deleting a bundle
Deleting a bundle is permanent and cannot be undone. Consider deactivating instead of deleting if you might want to use the bundle again.
- Find the bundle in your bundles list
- Click More actions (three dots)
- Select Delete
- Confirm deletion
Organizing bundles
Naming conventions
Use clear, descriptive names that make bundles easy to identify:- Good: “Summer Skin Care Bundle”, “Workout Starter Kit”, “Coffee Sampler 6-Pack”
- Avoid: “Bundle 1”, “Test”, “New Bundle”
Managing many bundles
If you have many bundles:- Use consistent naming: Group similar bundles with prefixes like “Holiday - ”, “BOGO - ”, “Mix - ”
- Deactivate seasonal bundles when not in season rather than deleting
- Track performance: Use analytics to identify which bundles to keep, optimize, or remove
- Regular audits: Review bundles monthly and deactivate underperformers
Bundle product management
Adding products to a bundle
Use the product selector when creating or editing bundles:- Click Select Products
- Search your catalog or browse products. The search covers your whole catalog.
- Products already in the bundle start out selected.
- Confirm the selection. The products appear in the bundle editor.
Removing products from a bundle
- Open the bundle
- Click the X or remove icon next to the product
- Save your changes
Product availability
- Products must have available inventory to appear in bundles
- If a product goes out of stock, the bundle widget may not appear or will show unavailable
- Products can be in multiple bundles simultaneously
Bundle preview
Before saving, use the preview to see how your bundle will appear on product pages:- Widget layout and colors
- Product images and prices
- Discount calculation
- Button styling
Preview on your store
Once a bundle is saved, you can check it on your real product page before you turn it on:- Open the bundle and select Preview on your store in the See it on your store card.
- Your product page opens in a new tab with the saved bundle showing and a small “Bundle preview” label at the bottom.
Bulk actions
Use the checkboxes next to bundle names to select up to 100 bundles, then choose an action from the toolbar:- Activate or Pause the selected bundles.
- Change discount to set the discount type and value on every offer in the selected bundles. Fixed-price discounts only apply to Volume and Mix & Match bundles; other types are skipped.
- Change text to set a new title, a new subtitle (applied to every offer), or both. Leave a field empty to keep its current text.
- Apply style to replace each selected bundle’s design with one of your saved templates.
- Delete the selected bundles.
Best practices for bundle management
Start with 3-5 bundles
Start with 3-5 bundles
Don’t overwhelm customers or yourself. Start with a few well-thought-out bundles and expand based on performance.
Review performance monthly
Review performance monthly
Check analytics monthly and deactivate low-performing bundles. Replace them with new bundles to test.
Seasonal rotation
Seasonal rotation
Create seasonal bundles for holidays and events. Deactivate when the season ends but keep them for next year.
Test different approaches
Test different approaches
Try different bundle types, discount levels, and product combinations. Use analytics to see what works best for your store.
Keep bundles fresh
Keep bundles fresh
Update bundle products and descriptions periodically to maintain customer interest. Even small changes can improve performance.
Troubleshooting
Bundle not showing on product pages:- Verify bundle is active
- Check that product page app block is added in theme editor
- Ensure products in bundle have available inventory
- See troubleshooting guide
- Clear your browser cache
- Check in an incognito/private browser window
- Allow a few minutes for changes to propagate